Customization
How to modify Grid data ?
Please follow the explaination of the whole process or guideline about "How to display the SKU or Meta Data or any other informations in the product grids front-end JS template" step by step. It may help you to adapt to the cartsy faster if you are going under any custom development.
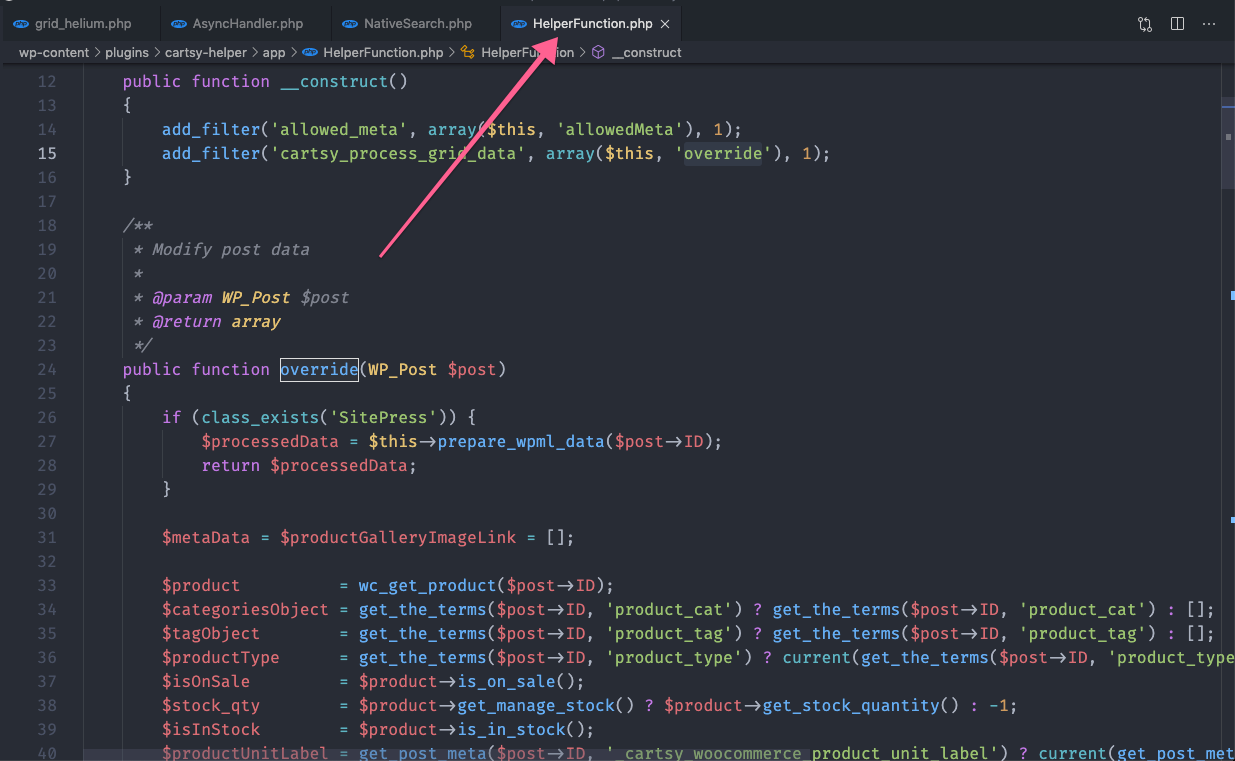
Step 1 : As "Data" inside the JavaScripts template need to be provided via PHP, so there are helper functions to accomplish that. Please check the code editor breadcrumb in the screenshot
screenshot :
Step 2 : Suppose, user wants to fetch custom data (e.g., SKU) in the homepage product grid (e.g.,Helium).
Screenshot:
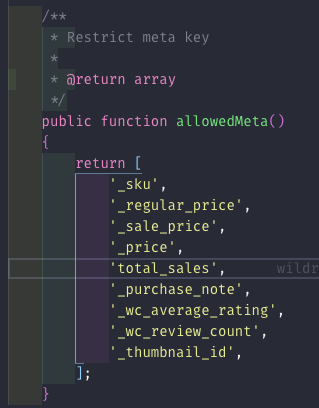
For your informations, in above screenshot already some metadata is available inside the product grid template.
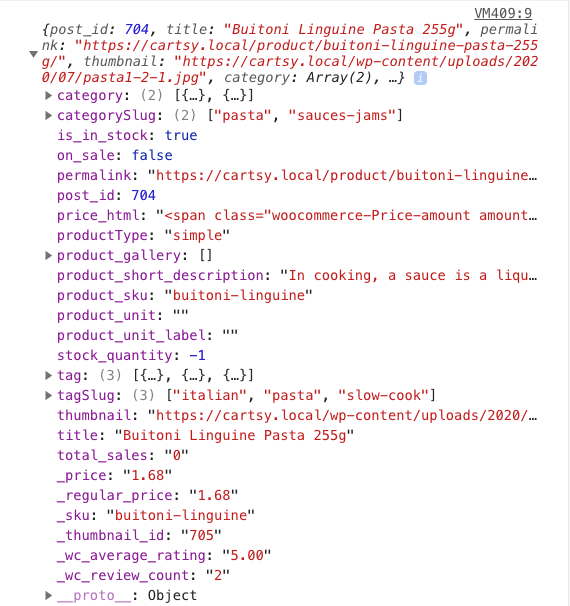
Now, console screenshot for the fetched data.
Step 3 : Now user displays that custom data (e.g., SKU) inside the helium grid just after the title area. Please follow up on the code in the screenshot.
Homepage JS template grid code is located inside wp-content > cartsy-helper > templates > grid folder.

This will generate a view like this in the homepage grid.
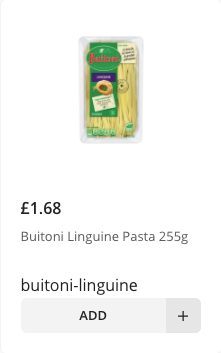
The user needs to fix css according to his design.
Important things to remember
If any custom data is needed but unavailable in the allowedMeta function, then it also can be added by following this procedure. In the override, the function adds the data inside the $processedData variable.

Suppose User wants to add product status inside the grid. Then he can add a variable and append this in the `$processedData`.
Then it will appear and ready inside the grid data for display.
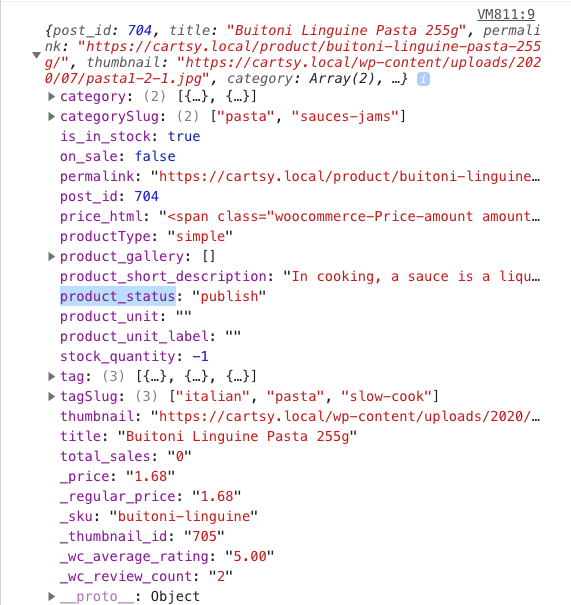
At last, the Step 3 procedure is needed to be done for display purposes. For more help, please follow up with this helper link to get more function definitions. https://www.businessbloomer.com/woocommerce-easily-get-product-info-title-sku-desc-product-object
Which file has to edit to customize Related Products or Recently Viewed Products in product single page ?
Those grids in the product single page is similar like the homepage grid. But the key difference is, those grids are rendered via PHP not JS template (like homepage).
Those PHP rendered grid templates code is located inside. wp-content -> themes > [Cartsy theme] > template-parts -> product-grid folder.
How to add custom taxonomy in Product post type ?
Special note
You need to download and install ___RedQ Reuse Form plugin to enable this feature. You can download this plugin from WordPress dashboard > Cartsy > Plugins area.
In this chapter we will discuss how to inject custom taxonomy in Product post type. Current there are three custom taxonomies along with WooCommerce provided taxonomies. And all of them are rest-api enabled by default.
- Product genre [identifier: cartsy_product_genre]- Product brand [identifier: cartsy_product_brands]- Product price range [identifier: cartsy_product_price_ranges]
Step: 01
If you want to add more taxonomies under Product tab then there are filter hooks available. Please follow up this below code example. Here Rental is the registered new taxonomy type.
add_filter('cartsy_helper_custom_taxonomy_list', 'add_new_taxonomy', 10, 1);function add_new_taxonomy($args){$args[] = ['name' => 'rental','showName' => esc_html__('Rental', 'cartsy-helper'),'postType' => 'product','hierarchy' => true];return $args;}
Step: 02
Then you need to enable it for WordPress rest-api by following the below code.
add_filter('cartsy_helper_rest_supported_taxonomies', 'cartsy_enable_rest_api_custom_taxonomy', 10, 1);function cartsy_enable_rest_api_custom_taxonomy($args){$args[] = 'rental';return $args;}
How to add custom termmeta in Product taxonomies ?
Special note
You need to download and install ___RedQ Reuse Form plugin to enable this feature. You can download this plugin from WordPress dashboard > Cartsy > Plugins area.
In Cartsy theme we have provided a filter hook to added termmeta on the taxonomies under Product post type. For now, there is a predefined termmeta option. That is adding thumbnail image options for each taxonomy.
Use case: In product search page you might need taxonomy thumbnail image. That's why a predefined thumbnail option is already built inside the code. All you need is to enlist that taxonomy in the filter hook.
add_filter('cartsy_add_term_meta_to_taxonomies', 'add_thumbnail_option_to_below_taxonomies', 10, 1);function add_thumbnail_option_to_below_taxonomies($args){$args[] = 'rental';return $args;}